
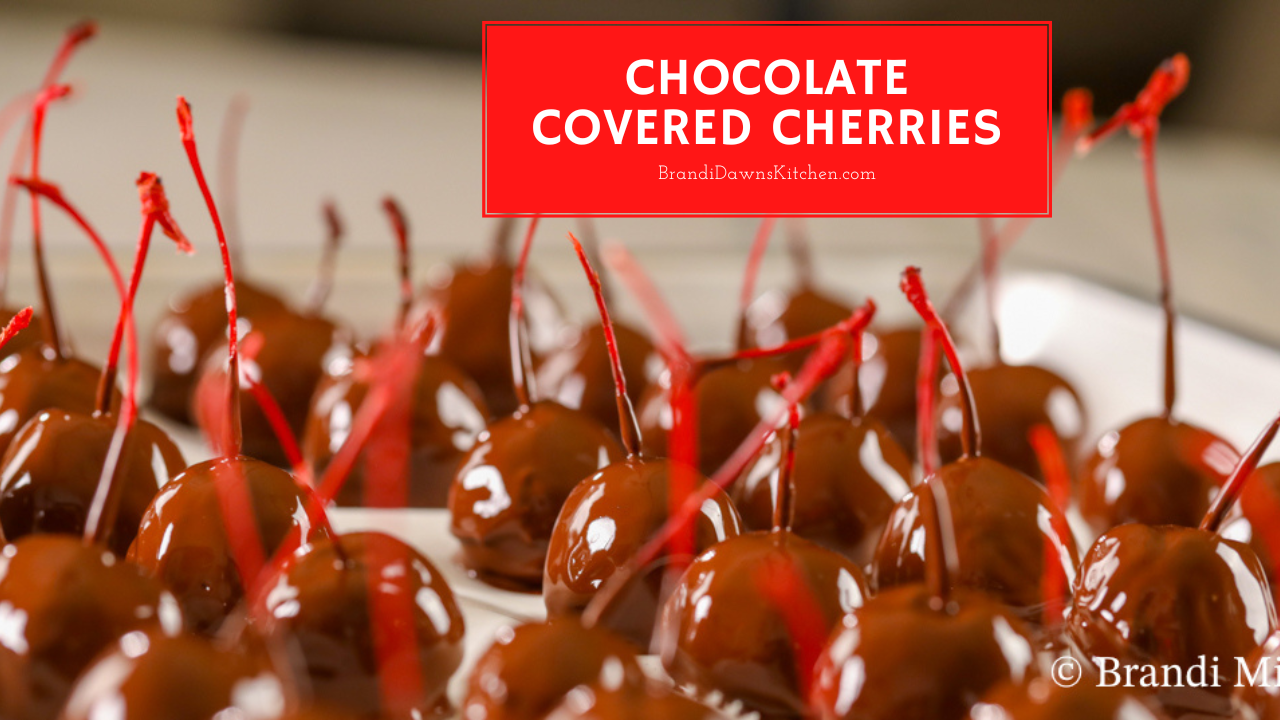
It's easier than you think to achieve gourmet chocolate-covered cherries for any occasion. Our family and friends request these each year and these are perfect to add our Chocolate Covered Cherries Recipe to your Christmas candy-making list. Our chocolate covered cherry tastes like Queen Anne chocolate covered cherries with stems! This recipe does not use a candy/chocolate mold, however, if you prefer to use a mold to form the chocolate around cherries, use my Chocolate Covered Cherries Recipe Using a Mold.
Make these with Peanut Brittle, Oreo Balls or Candied Pecans, and you will be ready for the Christmas candy-giving holiday season.
Jump to:
Chocolate Covered Cherry Detailed Video
Chocolate Covered Cherry Ingredients
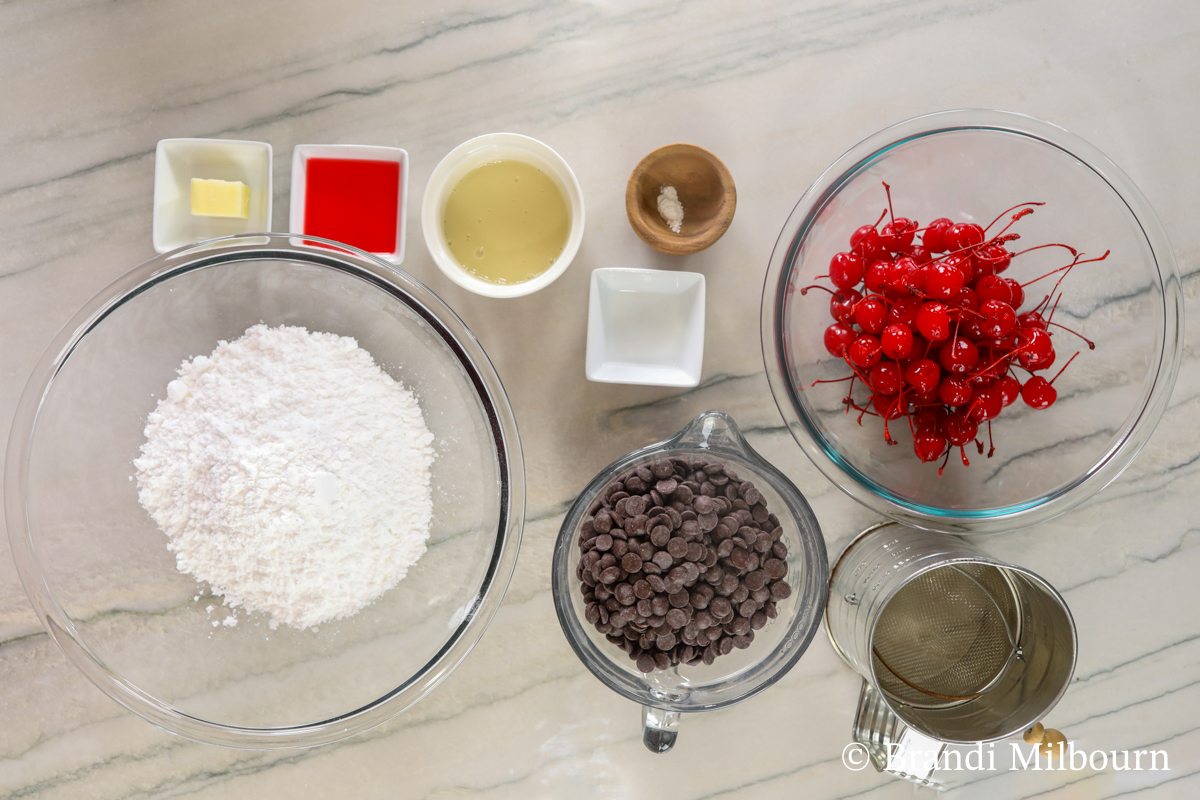
- Maraschino cherries - decide if you want stems or no stems
- Chocolate - Milk or Dark Chocolate. See more below on chocolate choices
- Powdered sugar - not granulated nor caster sugar. Sift after measuring powdered sugar
- Sweetened condensed milk - any brand will work. Not evaporated milk.
- Cherry juice - from maraschino cherries
- Almond extract - flavor of chocolate covered cherries. Not vanilla extract.
- Cream of tartar - helps to invert the sugar syrup for a soft center. Pastry fondant does not contain cream of tartar. Too much cream of tartar causes the fondant to be soft when forming around the cherry.
- Butter - margarine will work here, but we always prefer butter over margarine.
See recipe card for quantities.
Instructions for Chocolate Covered Cherries Recipe
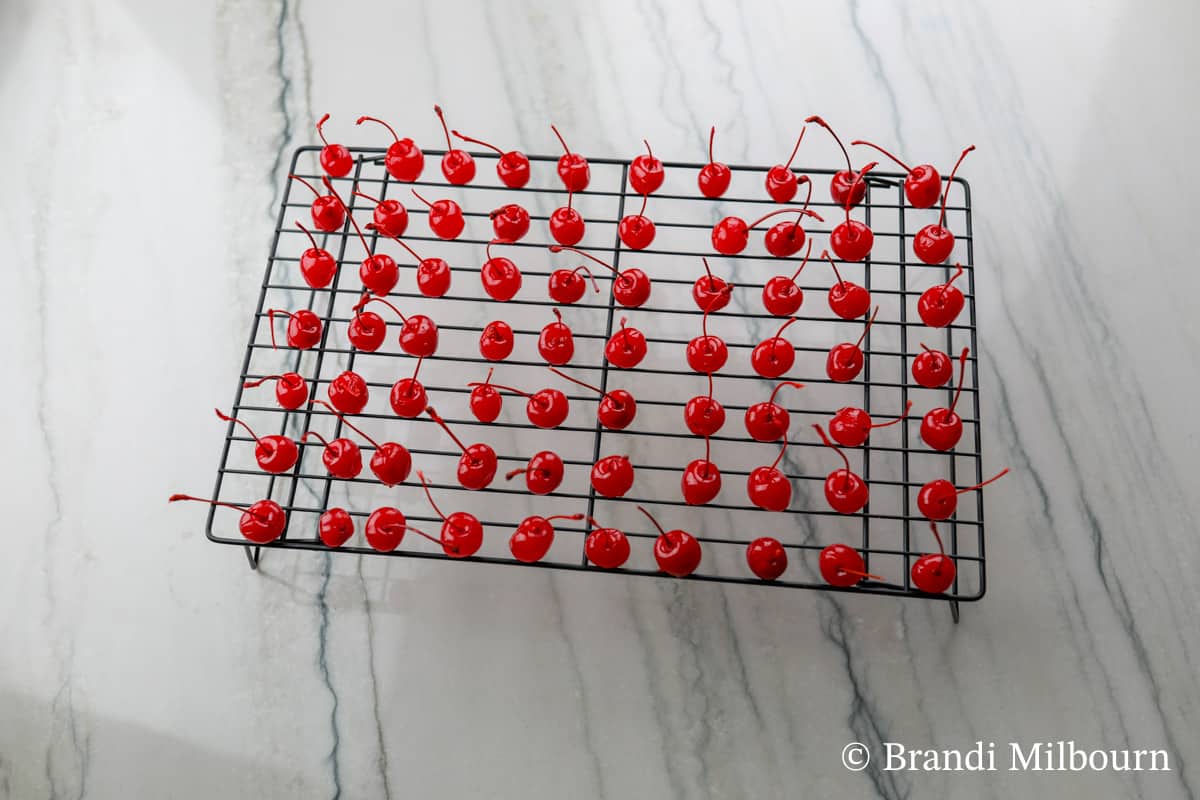
Strain cherries then arrange on a rack to dry. Separate them to not touch each other.
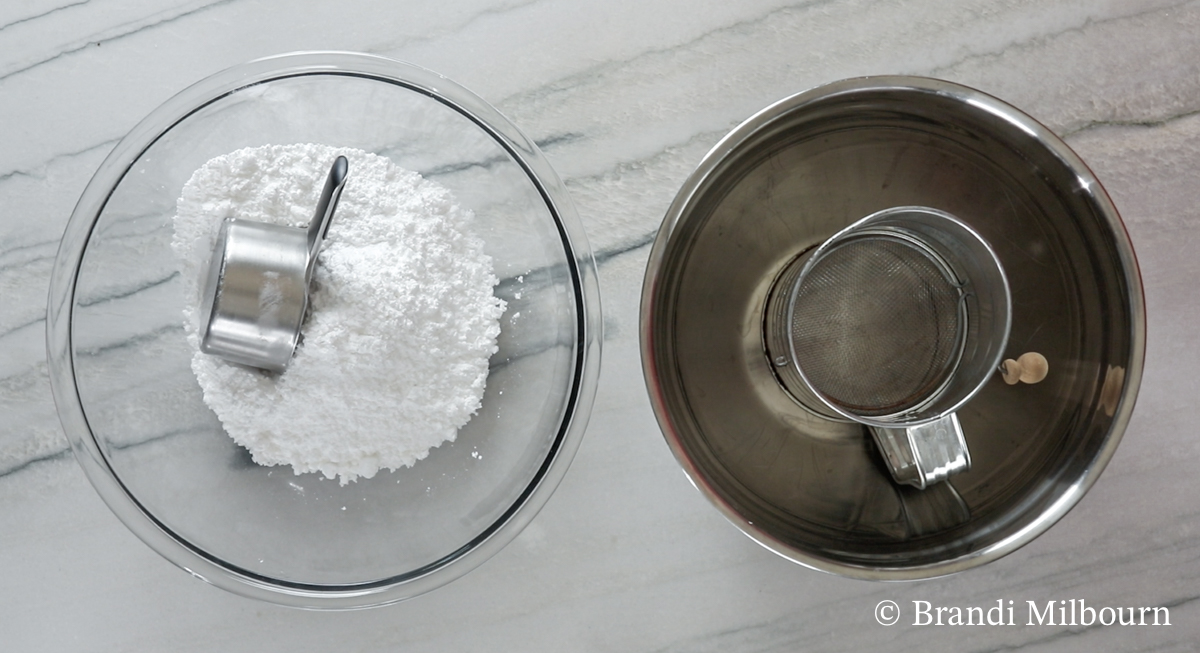
Measure out powdered sugar then sift into a medium mixing bowl.
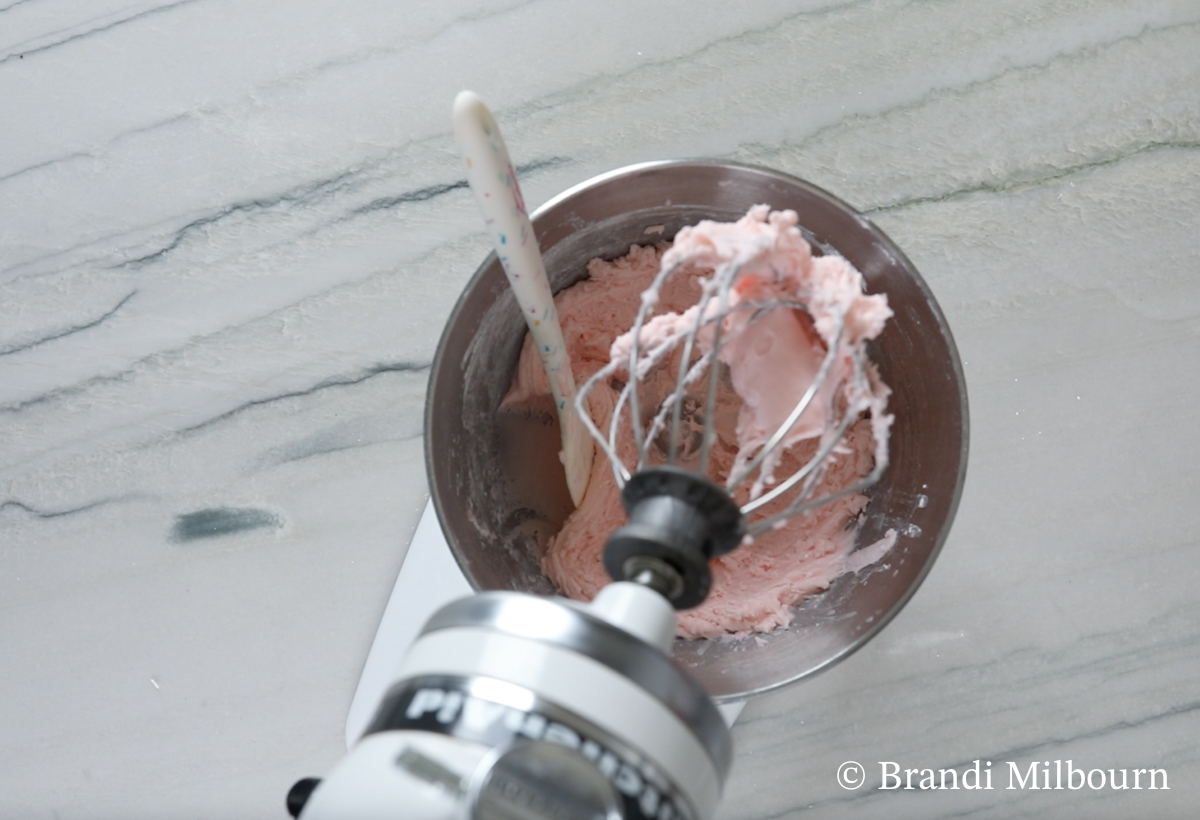
In a medium bowl or stand mixer, add butter, sweetened condensed milk, cherry juice, almond extract, and cream of tartar. Using the beater bar, mix until smooth, then add about half the sifted powdered sugar. Scrape down sides as needed. Add remaining powdered sugar, mix until combined.
The fondant will be pliable but not super sticky. Test by squeezing fondant between your fingers. There should not be residue left on your fingers. If the fondant sticks to your fingers, add powdered sugar, 1 Tablespoon at a time.
Prepare a baking sheet covered with parchment paper.
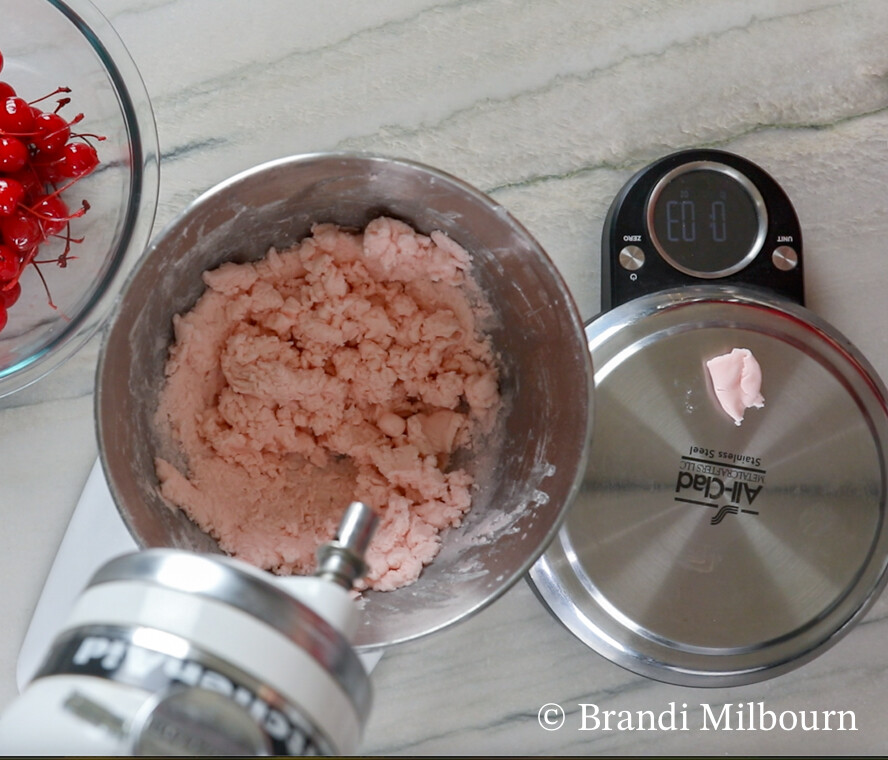
Weigh out approximately 0.3 oz fondant or half dollar size of fondant.
First, roll the fondant into a ball.
Forming the Fondant

Next, press the fondant into a flat circle.
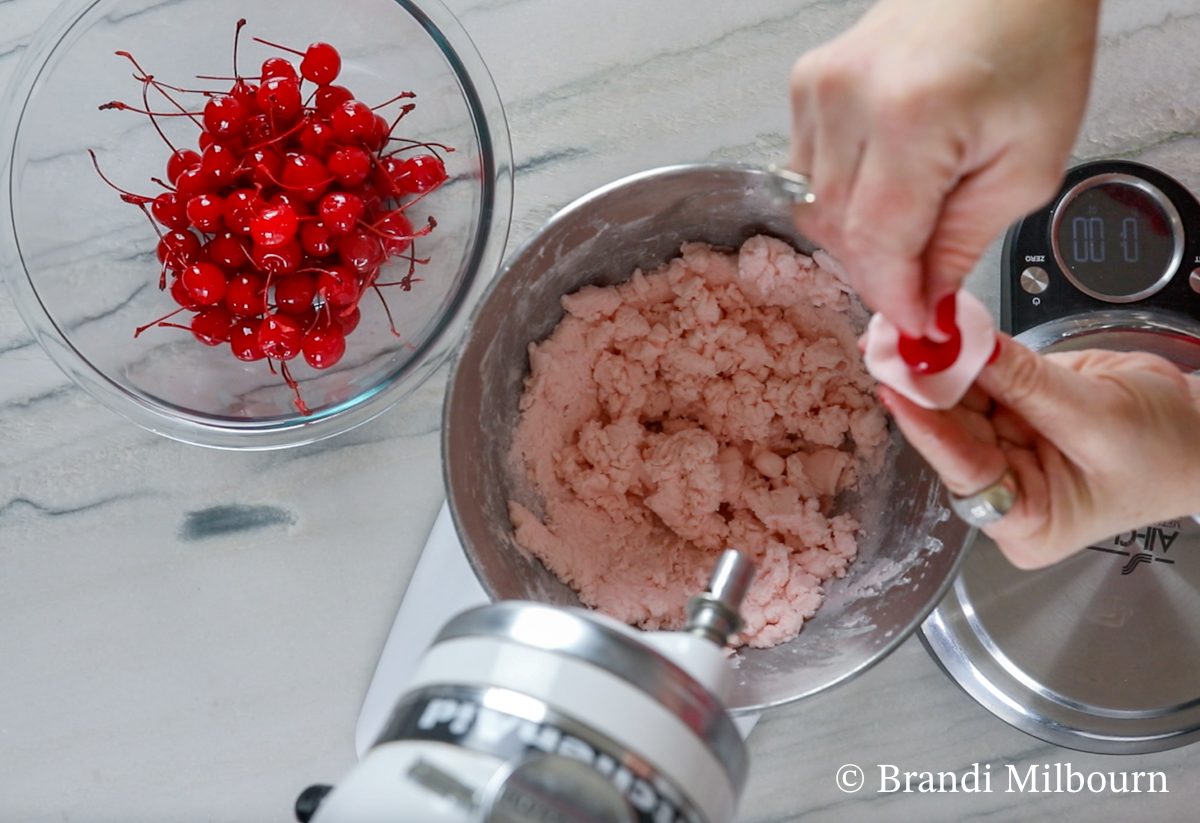
Place cherry in the middle of the fondant circle. Fold the fondant up around the cherry leaving a hole at the stem. This allows the chocolate to seam in the liquid. If the fondant is on the stem the fondant will not stay sealed inside.

Finally, roll fondant covered cherries between fingers back and forth to smooth out edges and make round.
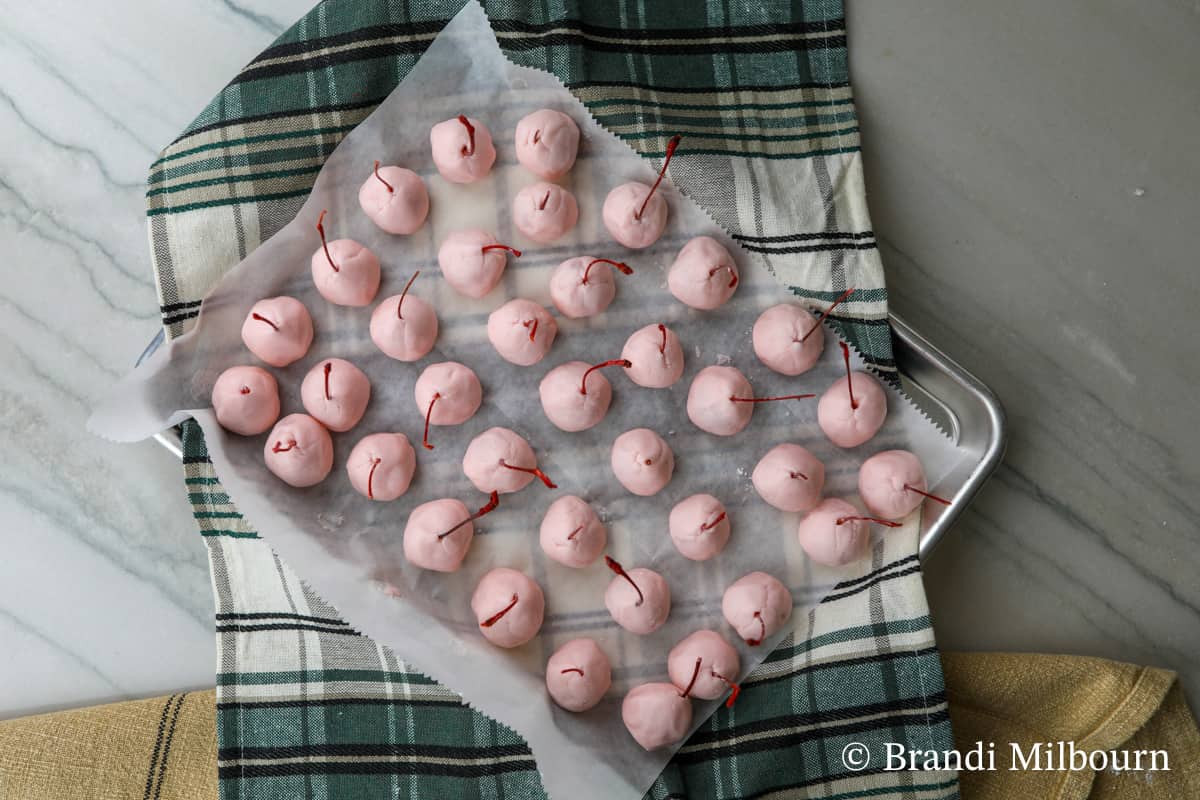
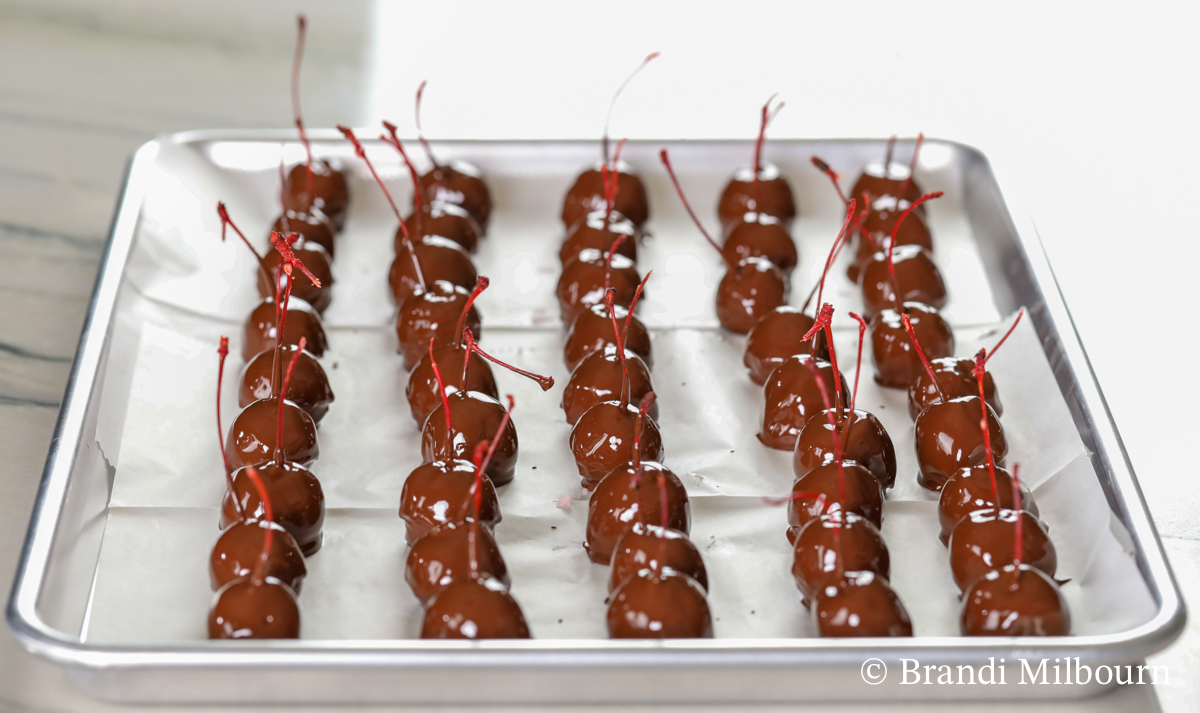
Place fondant covered cherries on prepared parchment paper lined sheet pan.
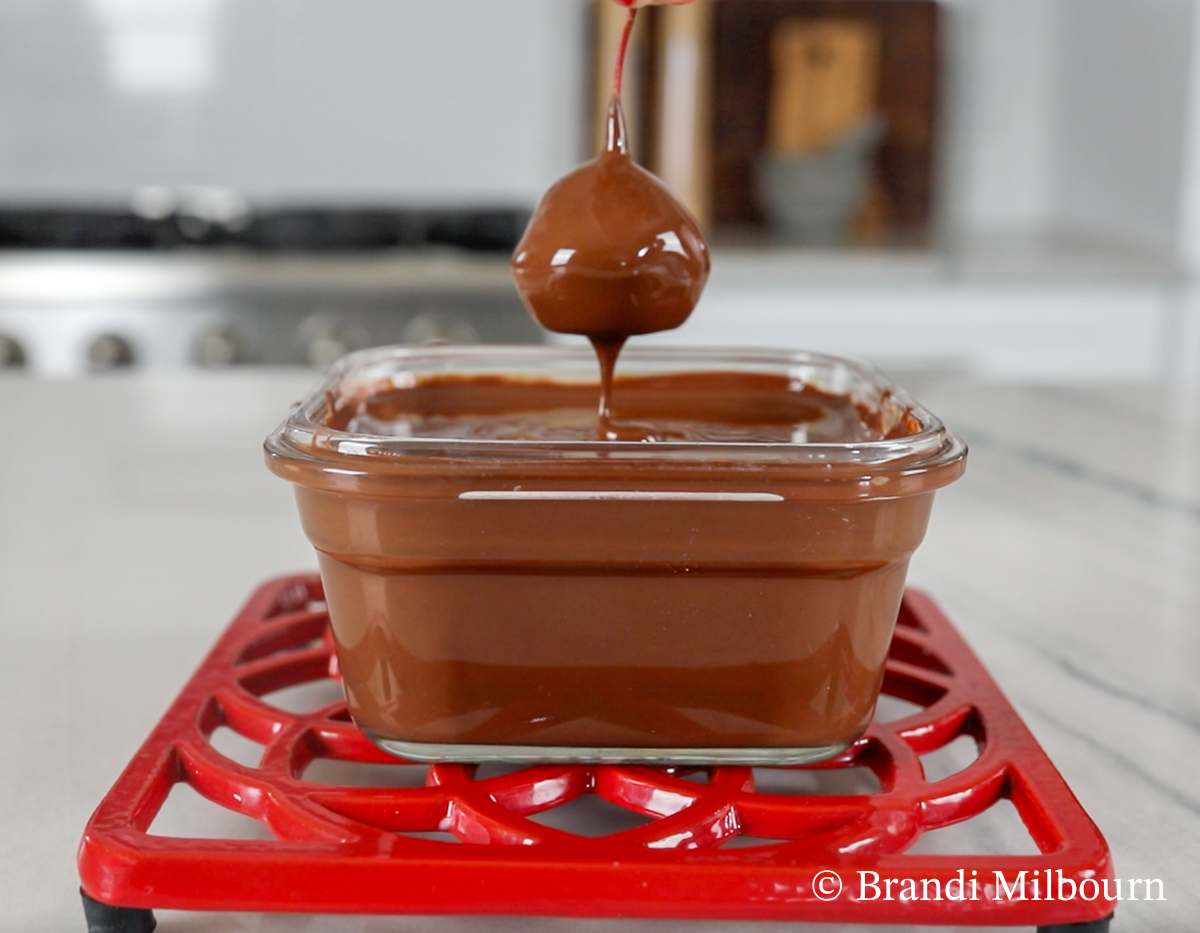
Approximately halfway through applying fondant, preheat oven to 180°F. Place ¾ of the chocolate in oven-proof bowl, then place bowl in oven and turn oven off. Or heat chocolate either using the water bath or microwave method by heating in 15 second increments.
Continue checking on chocolate by using a digital thermometer. Remove chocolate at 105°F for milk chocolate or white chocolate then add the remaining chocolate, stirring until 88°F for milk & white chocolate. Remove dark chocolate at 122°F and add remainder of chocolate, stirring until reaches 91°F for dark chocolate.
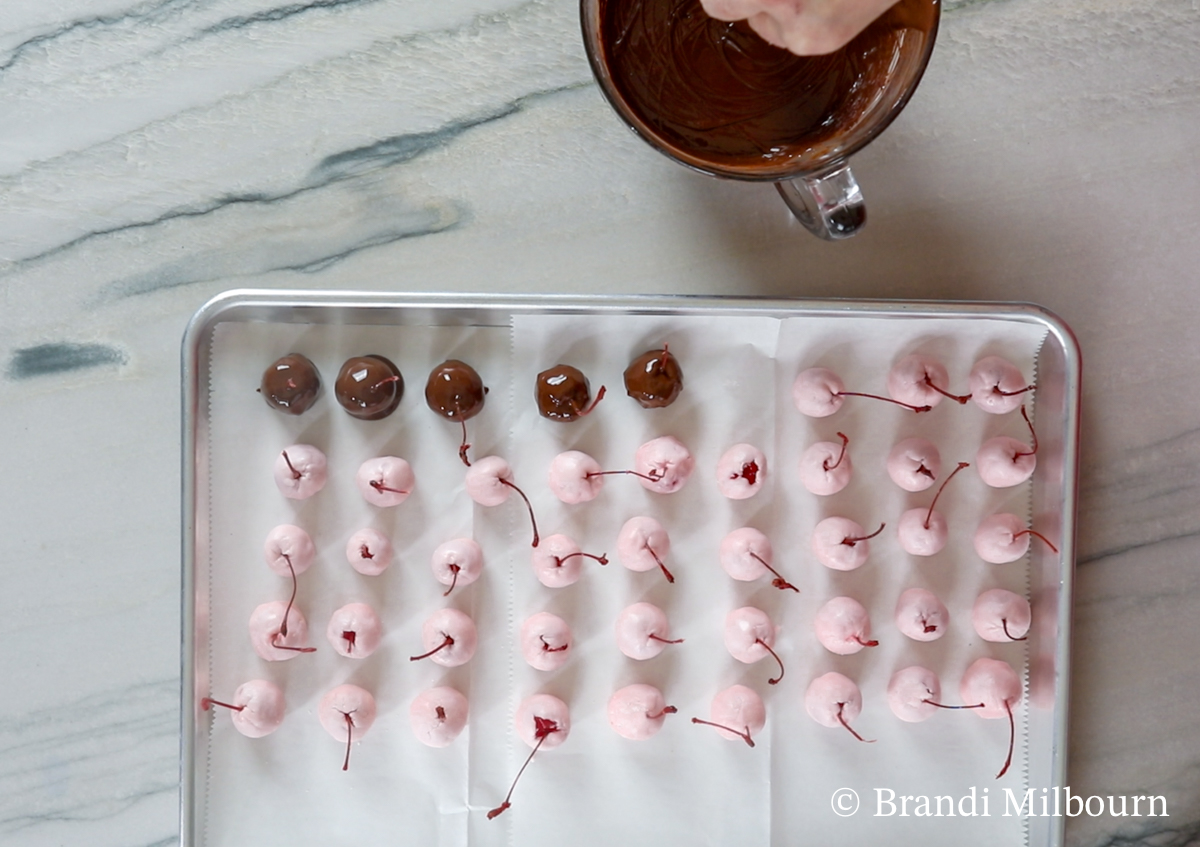
Dip each cherry then continue dip up the stem about 1 inch and return to parchment paper. Twist the stem between fingers to remove excess chocolate and return the cherry to parchment paper. Freeze tray of completed chocolate covered cherries into the freezer for about 10 minutes.
Reheat chocolate, remove cherries. Dip cherries one additional time and up the stem about 1 inch.
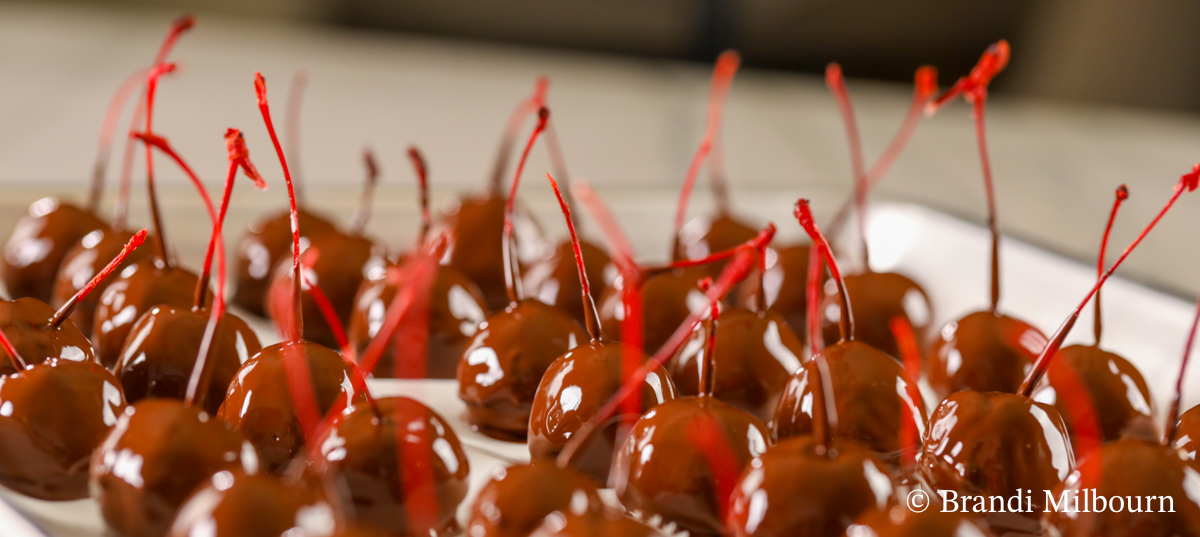
Let cherries sit at room temperature for at least 1 hour, preferably 3 hours. Place finished cherries in a glass or plastic sealed container for 2-4 weeks at room temperature. Preferably a dark area like the back of a cabinet. These are typically ready about 2 weeks.
Tempering Chocolate
Temper your chocolate: Nobody wants dull-looking chocolate after all the hard work. Melt ¾ of chocolate needed, next, remove white or milk chocolate when it reaches 105°F then add the remaining chocolate, stirring until 88°F. Remove dark chocolate at 122°F and add remainder of chocolate, stirring until reaches 91°F for dark chocolate. Milk Chocolate is ready to dip at 88 °F. Milk chocolate contains more milk fat with a lower melting point. Dark Chocolate is ready to dip at 91 °F. Dark chocolate has less milk fat with a slightly higher melting point. White chocolate can be dipped at 80 to 82°F or follow the milk chocolate instructions. Tempered chocolate can be stored for several months at 65°F. Chocolate will seize if comes in contact with water and then cannot be tempered. Read the full tip on Tempering Chocolate here.
Choice of Chocolate
You can use couverture discs or chocolate bars. Callebaut, Valrhona and Guittard are good brands. We love Callebaut, dark callets. Ghirardelli is easy to find in your local grocery store.
Your choice of milk or dark chocolate can be used here however skip the chocolate chips. Chocolate chips are formulated to retain their shape when heated which makes them good for cookies. I've never tried white chocolate but it is an option.
Equipment
Extendable Strainer - Find it Here.
Cherry Drying Rack - I use my cookie cooling rack. Find Mine Here.
Powdered Sugar Sifter - Find Mine Here.
Stand mixer - Find Mine Here.
Digital food scale - Find Mine Here.
Rubber Spatula - Find My Favorite Here.
Oven Safe Measuring Cup I use to Heat Chocolate - Find It Here.
Storage
Start making these mid-November or right after Thanksgiving in order to be ready by Christmas.
The centers of these need to turn to liquid and can take up to two weeks in a sealed container. The extra amount of powdered sugar lengthens the time for the centers to turn liquid, use sparingly as some could take up to 4 weeks.
We have not tried freezing these, but if you have, let us know in the comments.
Top tips
Temper your chocolate! See above.
Coming Soon: Watch this video on How and Why to Temper Chocolate.
Start making these mid-November or right after Thanksgiving to be ready by Christmas.
The centers of these need to turn to liquid and these take up to two weeks in a sealed container using the exact measurements above.
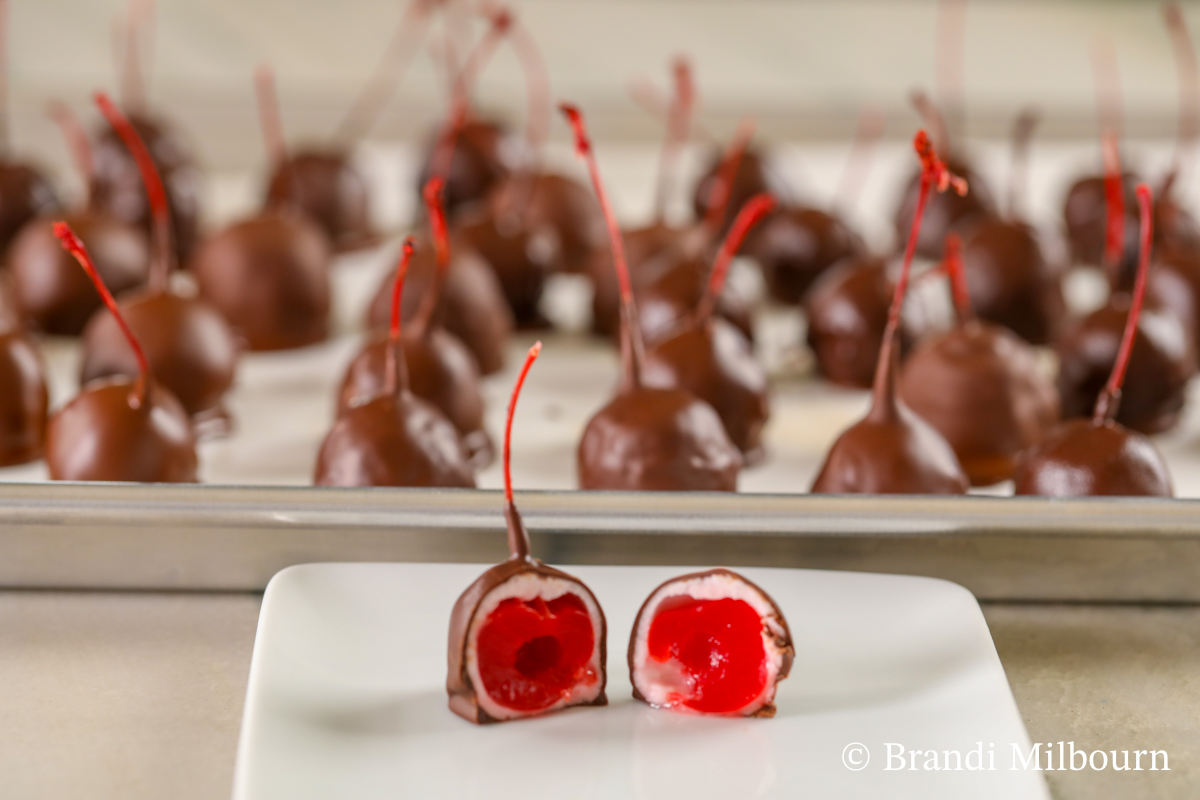
Photo 1: Day 1 - just finished making.
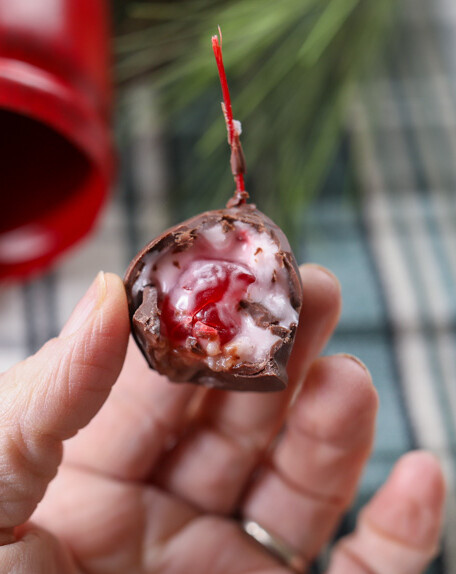
Photo 2: Two weeks later.
Related
Looking for other recipes like this? Try these:
Print
Stemmed Chocolate Covered Cherries Recipe (Without Mold)
- Total Time: About 6 hours
- Yield: 70 1x
Description
Chocolate covered cherries are perfect for the holidays with their delicious liquid centers holding a cherry and covered in scrumptious chocolate. These chocolate covered cherries taste like Queen Anne chocolate covered cherries and are the real deal. Bet you can't just have one! These are perfect to add to your Christmas candy making list. It's easier than you think to achieve gourmet chocolate covered cherries for any occasion.
Ingredients
1 ½ Tbsps butter or margarine
4 ¾ cup powdered sugar
3.5 ounce can sweetened condensed milk
3 tablespoons Cherry juice
⅛ teaspoon cream of tartar
½ teaspoon almond extract
12 oz Chocolate wafers, callets or bar (chopped if using a chocolate bar)
70 maraschino cherries
Instructions
Using stemmed cherries without a chocolate mold:
Strain cherries then arrange on a rack to dry. Separate them to not touch each other.
Measure out powdered sugar then sift into a medium mixing bowl.
In a medium bowl or stand mixer, add butter, sweetened condensed milk, cherry juice, almond extract, and cream of tartar. Using the beater bar, mix until smooth, then add about half the sifted powdered sugar. Scrape down sides as needed. Add remaining powdered sugar, mix until combined.
The fondant will be pliable but not super sticky. Test by squeezing fondant between your fingers. There should not be residue left on your fingers. If the fondant sticks to your fingers, add powdered sugar, 1 Tablespoon at a time.
Weigh out approximately 0.3 oz fondant or half dollar size of fondant.
First, roll the fondant into a ball. Next, press the fondant into a flat circle. Place cherry in the middle of the fondant circle. Fold the fondant up around the cherry leaving a hole at the stem. This allows the chocolate to seam in the liquid. If the fondant is on the stem the fondant will not stay sealed inside.
Finally, roll fondant covered cherries between fingers back and forth to smooth out edges and make round.
Place fondant covered cherries on prepared parchment paper lined sheet pan.
Approximately halfway through applying fondant, preheat oven to 180°F. Place ¾ of the chocolate in oven-proof bowl, then place bowl in oven and turn oven off. Or heat chocolate either using the water bath or microwave method by heating in 15 second increments.
Continue checking on chocolate by using a digital thermometer. Remove chocolate at 105°F for milk chocolate or white chocolate then add the remaining chocolate, stirring until 88°F for milk & white chocolate. Remove dark chocolate at 122°F and add remainder of chocolate, stirring until reaches 91°F for dark chocolate.
Dip each cherry then continue dip up the stem about 1 inch and return to parchment paper. Freeze tray of completed chocolate covered cherries into the freezer for about 10 minutes.
Reheat chocolate, remove cherries. Dip cherries one additional time and up the stem about 1 inch.
Let cherries sit at room temperature for at least 1 hour. (Preferably 3 hours with moving from parchment paper.) Place finished cherries in a glass or plastic sealed container for 2-4 weeks at room temperature. Preferably a dark area like the back of a cabinet. These are typically ready about 2 weeks.
Notes
Temper your chocolate: Nobody wants dull-looking chocolate after all the hard work. Melt ¾ of chocolate needed, next, remove white or milk chocolate when it reaches 105°F then add the remaining chocolate, stirring until 88°F. Remove dark chocolate at 122°F and add remainder of chocolate, stirring until reaches 91°F for dark chocolate. Milk Chocolate is ready to dip at 88 °F. Milk chocolate contains more milk fat with a lower melting point. Dark Chocolate is ready to dip at 91 °F. Dark chocolate has less milk fat with a slightly higher melting point. White chocolate can be dipped at 80 to 82°F or follow the milk chocolate instructions. Tempered chocolate can be stored for several months at 65°F. Chocolate will seize if comes in contact with water and then cannot be tempered. Read our full tips on Tempering Chocolate.
Start making these mid-November or right after Thanksgiving in order to be ready by Christmas.
The centers of these need to turn to liquid and can take up to two weeks in a sealed container. The extra amount of powdered sugar lengthens the time for the centers to turn liquid, use sparingly. This recipe as written takes 2 weeks for liquid centers.
- Prep Time: 180
Eileen says
I'm going to try these this year with my other candies I make for holidays
Kelly says
Much better than other recipes I’ve made. This one is a keeper!